• About

Tag Archives: DIY

Rio 2016 Spirit

06 Saturday Aug 2016

Posted by clearlycorinna in DIY, Holidays, Home

≈ Leave a comment

Tags

DIY, JoAnn's, Kids' Craft, Olympic Craft, Rio 2016

DSC00367

It’s time for the Olympics.  I love the Olympics.  I have amazing fond memories of watching the Summer Olympics with friends in the neighborhood.  Staying up way past bedtime to watch while our parents chatted on the front porch.

For that reason, and the fact that I stumbled upon 4th of July clearence at JoAnn’s, G and I tackled this craft with her friend yesterday.

It was so simple.  Start with  paper plates, dessert size (approx 6 3/4 inches).  Cut around the the center of the plate where it starts to curve up.  You’ll want to cut through the side of the plate as well, so you can intertwine the rings later.

DSC00363

Pull out your paint-  We used acrylic since it’s going to be outside for the duration of the Olympics, it should be relatively water proof. Yellow, Blue, Green, Red and Black.  We  painted the both sides of the plate.  The back of the plate is the side that we decided would face out.  The paint coverage was better since it doesn’t have that coating making it hard for the paint to stick.

DSC00362

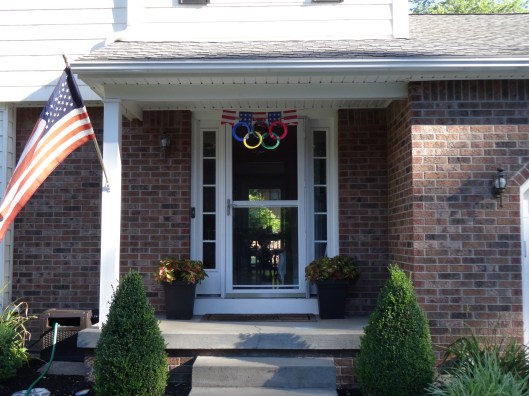
This is the banner that originally inspired me — 50% off at JoAnn’s ($7)

DSC00365DSC00364

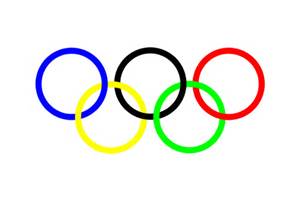
After the rings were dry, we added glitter glue to our rings for a little more pizzazz.  Then we taped the the rings together in the proper order paying special attention to the over under weaving of each color by looking at the rings on Wikipedia.

Olympic Rings

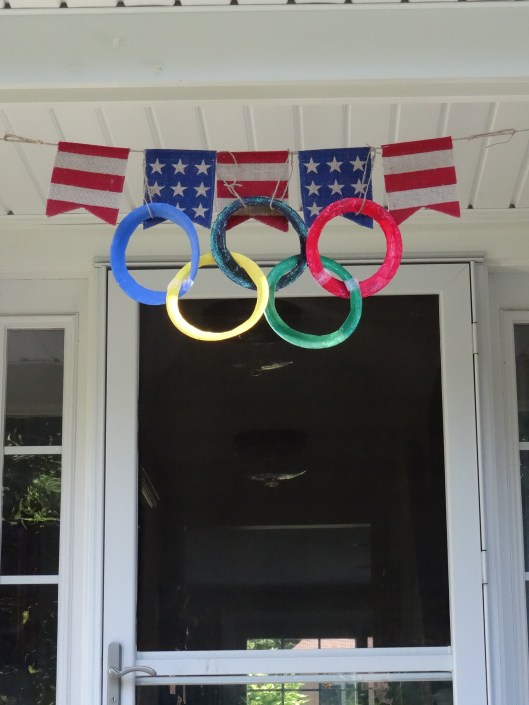
After tying the rings to the banner using twine,  I hung it by extending the length of the banner with additional twine and wrapping and cinching it under the vinyl wrap covering the pillars on our porch.

DSC00366

Ta Da!

I hope you enjoy the Rio 2016 Olympics with your family as much as we will.

DSC00368

Light Bulb! Crossbody or Clutch?

27 Thursday Aug 2015

Posted by clearlycorinna in DIY, Light Bulb!, Outfits

≈ 1 Comment

Tags

Big Buddha, clutch bag, coach, cobbler, crossbady bag, DIY, shoe repair

I can’t believe it but this is my 100th post!  Plus, I’m coming up on my 1 year anniversary of this little project!  Thanks to all of you who are paying attention.  I hope you get little bit of inspiration every once and awhile. 🙂DSC04860

This is the bag from yesterday’s post.  Let me start by saying I have little to no use for small bags.  I use them more on vacation, but I do like to have clutches that fit into my bigger bag so I can grab the clutch part on the go (running to the store mostly).  I need my clutches to have a wrist strap.  Having to hold onto a clutch leaves you with just one hand, so I always look for a wristlet that is big enough to hold my phone, some lip gloss and my wallet.

DSC04864

Here’s what I did to make this crossbody a clutch, I took it to a cobbler (shoe repair).  Had them remove the strap and add lobster claws to the long strap so it would be removable.  Then I asked them to make me a wrist strap and add a lobster claw to that.  Now I can change it from crossbody to wristlet anytime.

PS.  I have reworked this concept to work with other bags as well.  My pink Buddah Bag (seen here) has a removable crossbody strap that I add to this little bag that I mostly use a clutch. I bought this colorful number at Walmart when I was looking for a vacation clutch (I cut off the long strap that I had no use for).  And now that I have the wristlet attachment I can add it to almost any small bag I have.

DSC04901

Hooded Towel DIY

18 Tuesday Nov 2014

Posted by clearlycorinna in DIY

≈ Leave a comment

Tags

DIY, Easy Sew Project, Hooded Towel, Ikea Towels

DSC02569

SNOW DAY!!!!

What to do?  T got a call from a friend to play so G and I tackled a long delayed project, hooded towels.  We loved these when the kids were little but then they grew and I could not find a decent sized hooded towel for them.  They are perfect for post tubby/shower wrap ups!  These bath sheets are from Ikea.  They are huge, 39″ x 59″ and they have a great little loop for hanging.

DSC02565

So you’ll need a bath towel/sheet and a hand towel.  I chose matching patterns but a contrast would be cute too.

DSC02551

Step 1: Fold the hand towel in half, Like a hamburger roll not a hot dog roll, and cut it (in half).

DSC02553DSC02554DSC02555

Step 2: Then fold it in half again, so the raw edges meet, good side in.  Pin the raw edges together (this will be the top of the hood).

DSC02556

DSC02557

Step 3: Then sew along that edge.. first a straight line, then zigzag over that line twice and finish with another straight line.  Just to make extra sure it won’t come apart when washing.  This will give the hood a point.  If you’re ok with that move to Step 6.

DSC02560Step 4: Once sewn, lay the hood out like this and measure and inch or 2 from the tip and sew a straight line across.  This will flatten out the tip.

DSC02559DSC02561

Step 5: Cut the tip of the hood above the sew line.

DSC02564

DSC02563

Step 6: Attach the hood to the bath towel/sheet.  Match up the center of the hood with the center of the sheet before pinning it.  You want the seam to be on the inside of the towel so be sure to pin that way.  I laid it on top of the towel and did a straight stich from one end of the hood to the other.  Time will tell if that will be enough to hold it.

DSC02566

And that’s it! Each towel took me less than an hour.  The kids love them!

DIY Chandelier

14 Tuesday Oct 2014

Posted by clearlycorinna in DIY, Home

≈ Leave a comment

Tags

chandelier, DIY, exposed bulbs, gold spray paint, Krylon 18k gold plate, Tory Burch office

I have been looking at chandeliers for my family room for a long time (maybe 2 years?).  It takes me a long time to make decisions on these kinds of things but when I do, I love what I’ve chosen.  So of course, the one that I drooled over was $15,000.  Not happening. Even the knock off was $1,700.  Better, but still…no.  I was looking for the knock off of the knock off, but it never came, so I switched gears.

Then I started watching Hostages on CBS and saw this chandelier…

hostages chandelier

and it started me in a new direction.. but I wasn’t sold.  I wanted something more modern looking, less traditional, is that transitional?  Anyway, I started looking on Overstock for something more reasonable.  Then I saw some more photos of inspiration..

JeanLiuDesign_5

and

d3b5e8c9f9c6b95f3aeb9f6d4c212d82

but this put me into action..Tory Burch’s Office, I’m in love…

tory-burch-office-600x553

So this is my plan, find a chandelier and paint it gold.  Also, I wanted to take advantage of the exposed bulb trend going on right now (like this and this). Of course Hubby was against it.  Why would you buy something and then paint it?  But let’s face it, girls, sometimes that haven’t even designed the things that we want.  So we have to take matters in our own hands.

I finally wore him down.  I found this one at Home Depot.DSC01141

and this paint, Krylon 18k Gold Plate spray paint.

 DSC01146

Then my magic Hubby put his perfectionist in gear.  We took out all the pieces and figured out how to reassemble them so the Chandelier would be the right height.  There were 2 poles that connected to give it a maximum height that was way higher than we need so we took one of the poles out and it gave us the perfect drop from the center beam of our great room.  Then M put pieces of painter’s tape over the bulb sockets before painting.

DSC01139DSC01143DSC01144

Pretty easy, right? This is what we have so far with exposed bulbs…

DSC02264

but I was in Target the other day and spied these little lamps for $22 and I might have to add shades to look more like the Tory Burch Chandelier… hmmmm…stay tuned.

Chalkboard Drawing

11 Thursday Sep 2014

Posted by clearlycorinna in DIY

≈ 2 Comments

Tags

Chalkboard fonts, Chlakboard Sign, DIY, easel, Sidewalk Chalk

DSC00994

So I chaired the BooHoo WooHoo Breakfast for our elementary school this year.  We needed a welcome sign to put at the banquet hall.  After a few ideas I settled on doing a chalkboard sign using my daughter’s art easel.  I started by finding the right fonts.  I used Channel, Bergamot Ornament, KG ten Thousand Reasons, Grutch Shaded, Sketch Block and Digs My Heart.

DSC00983

After sizing them a bunch of times, I got it right and cut and taped it so it would fit properly on the chalkboard.  I think this was the hardest part!DSC00987

 Then I rubbed chalk on the back of the paper, paying special attention to the areas directly behind lettering.

DSC00985

When I finished, I taped it back to the chalkboard and traced (pressing relatively hard) the outline of each letter.  This will leave an impression on the board.  It’s faint but it’s all you’ll need.

DSC00989

I used sidewalk chalk because I wanted color.  Dip the end of the chalk into a cup of water and start tracing and filling in the letters.

DSC00991

DSC00992

DSC00993

Clean up any residual chalk with a paintbrush.  And Voila!  Not bad, right?

DSC00994

Follow on WordPress.com

Facebook

Facebook

Top Clicks

  • clearlycorinna.files.word…

Goodreads

Archives

Categories

Follow me on Instagram, clearlycorinna

No Instagram images were found.

clearlycorinna@gmail.com

Create a free website or blog at WordPress.com.

Privacy & Cookies: This site uses cookies. By continuing to use this website, you agree to their use.
To find out more, including how to control cookies, see here: Cookie Policy
  • Follow Following
    • clearlycorinna.com
    • Already have a WordPress.com account? Log in now.
    • clearlycorinna.com
    • Customize
    • Follow Following
    • Sign up
    • Log in
    • Report this content
    • View site in Reader
    • Manage subscriptions
    • Collapse this bar
 

Loading Comments...